TimeTo.Work
GuidesMake a schedule

Admin guide

Make a schedule on your computer

You're the admin: you build the week and send it to your team. It's always the same short loop. Find your way around, add your people, add their shifts, and publish. Here's that whole loop, step by step, with pictures.

Find your way around

Your week is a grid: your people down the left, the days across the top, and a shift sits where a person meets a day. Everything you need is along the top bar.
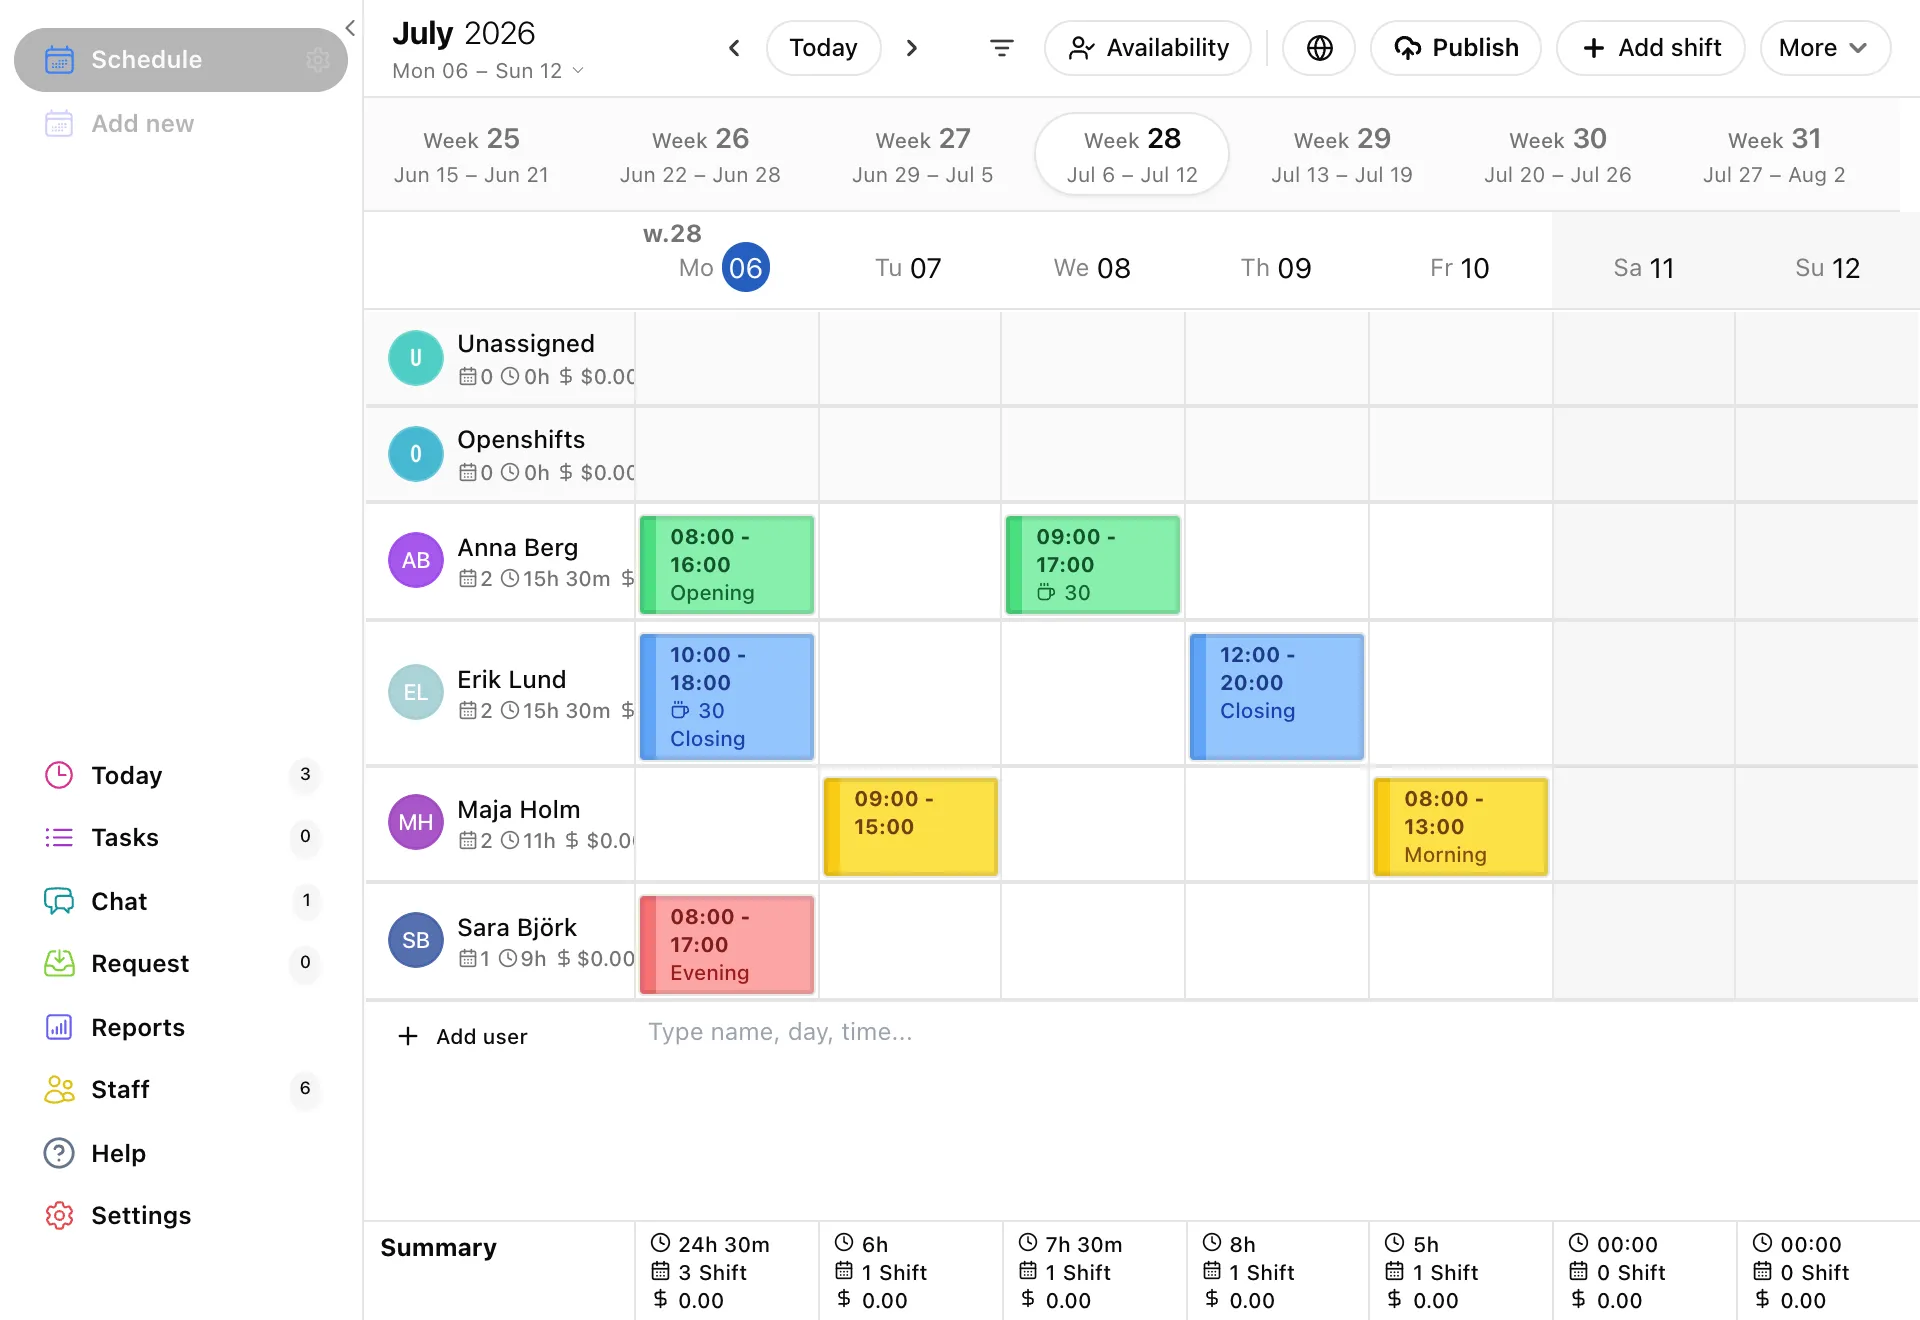
The schedule: staff rows on the left, days across the top, the week bar above, and the top bar with Today, Publish and Add shift.
  • Today step one week back or forward, or jump straight back to this week.
  • The row of weeks at the top (Week 28, 29, 30) lets you click any week to plan ahead. Click the date under the month to show or hide it.
  • + Add shift and Publish live top-right. More holds extras like copy / paste and clear week.

Lost? The big blue dot marks today, and Today always brings you home.
Add your people to the schedule

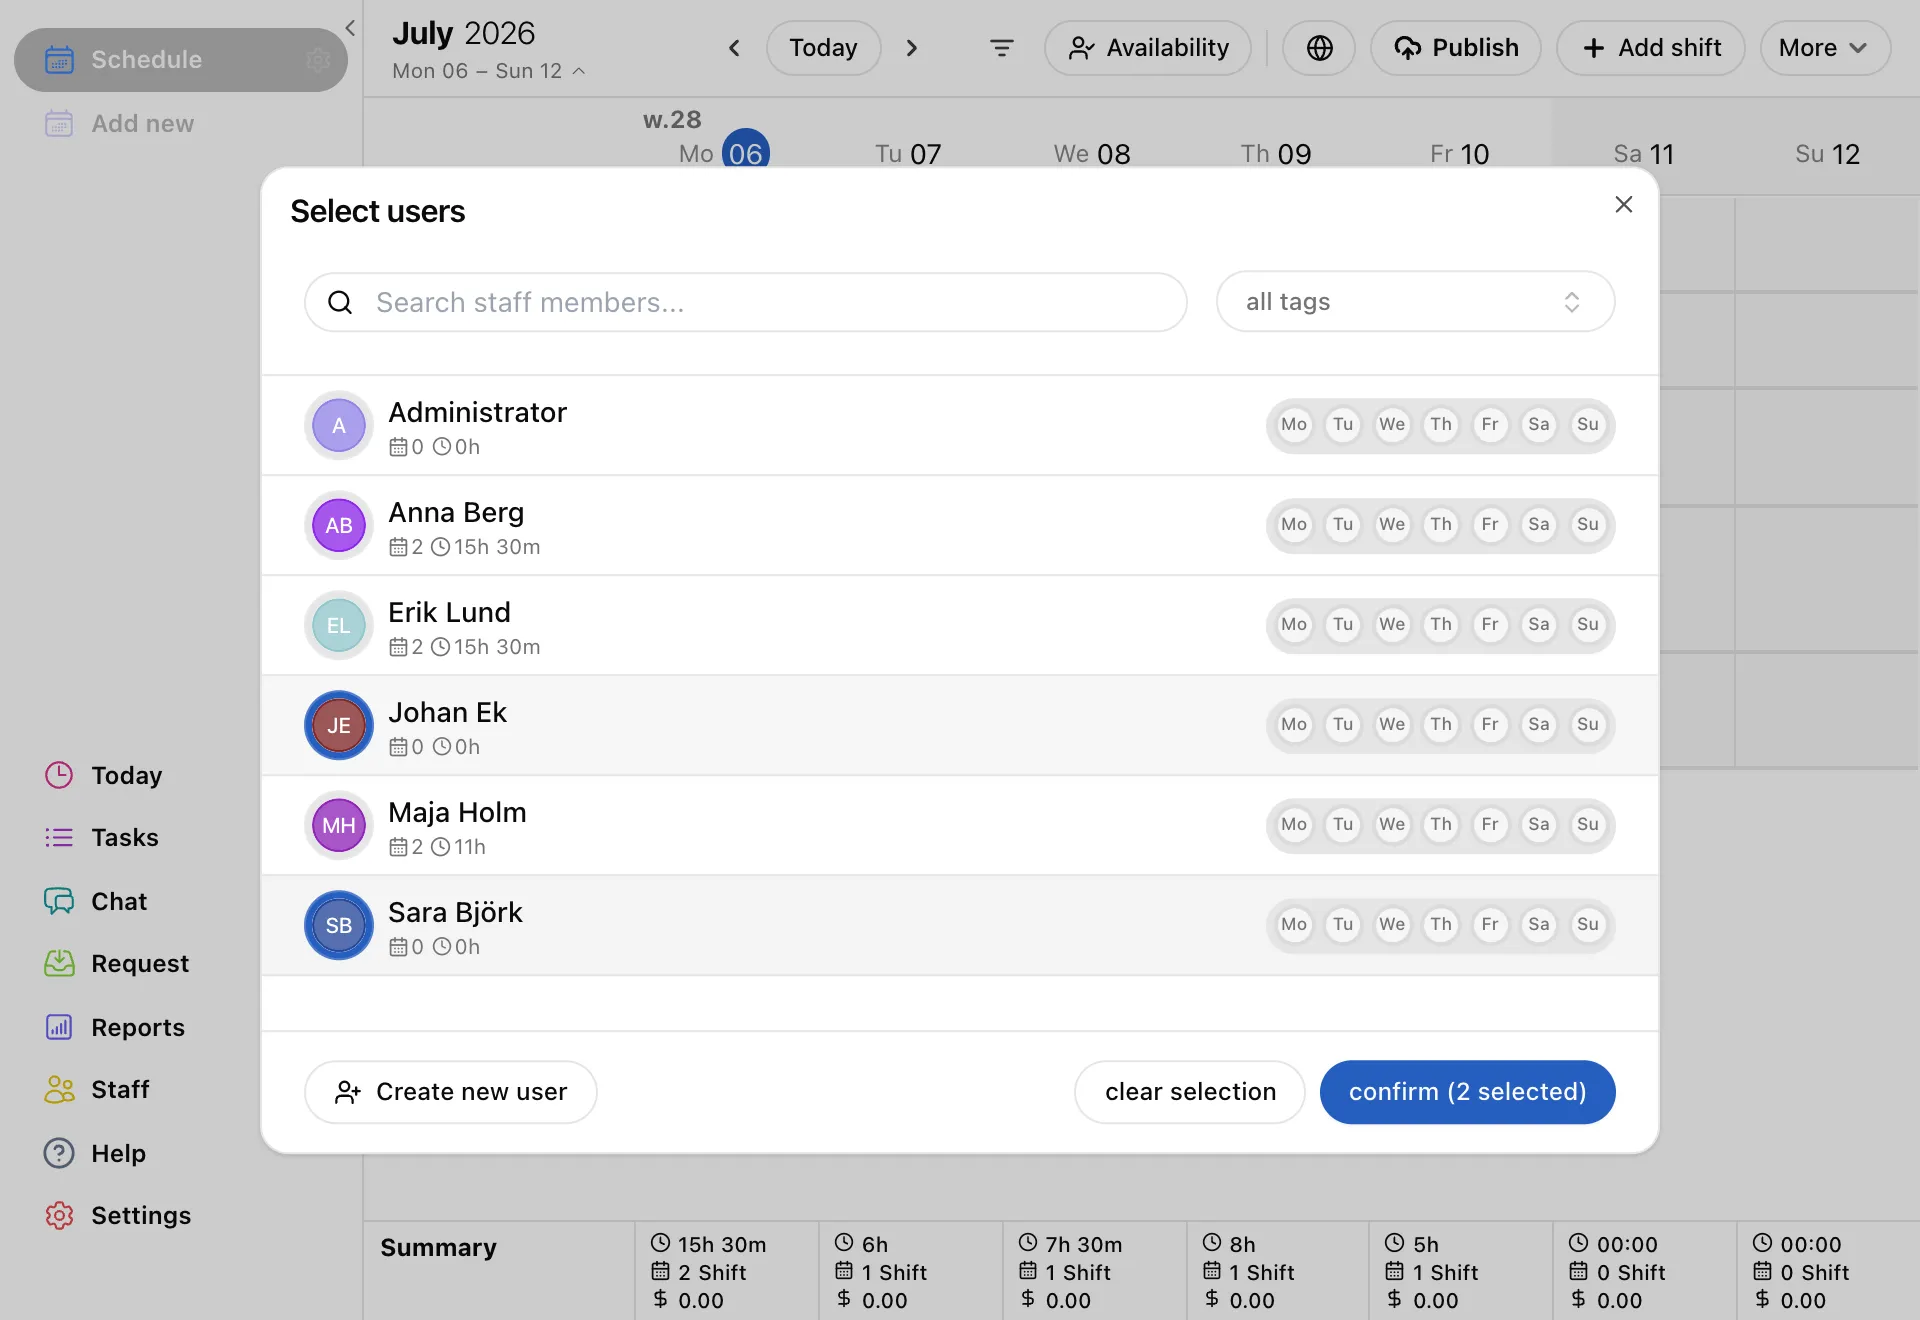
An empty week needs people first. Press + Add user under the staff list. The Select users window opens: search, tick everyone you want, and press Confirm. They appear as rows, ready for shifts.

The Select users window: a search box, your staff list with weekday availability, Create new user, and a Confirm button.
  • New starter not in the list yet? Use Create new user at the bottom-left.
  • In a hurry? The "Type name, day, time" box on the schedule adds a person, and even their first shift, just by typing.

Add or change a shift

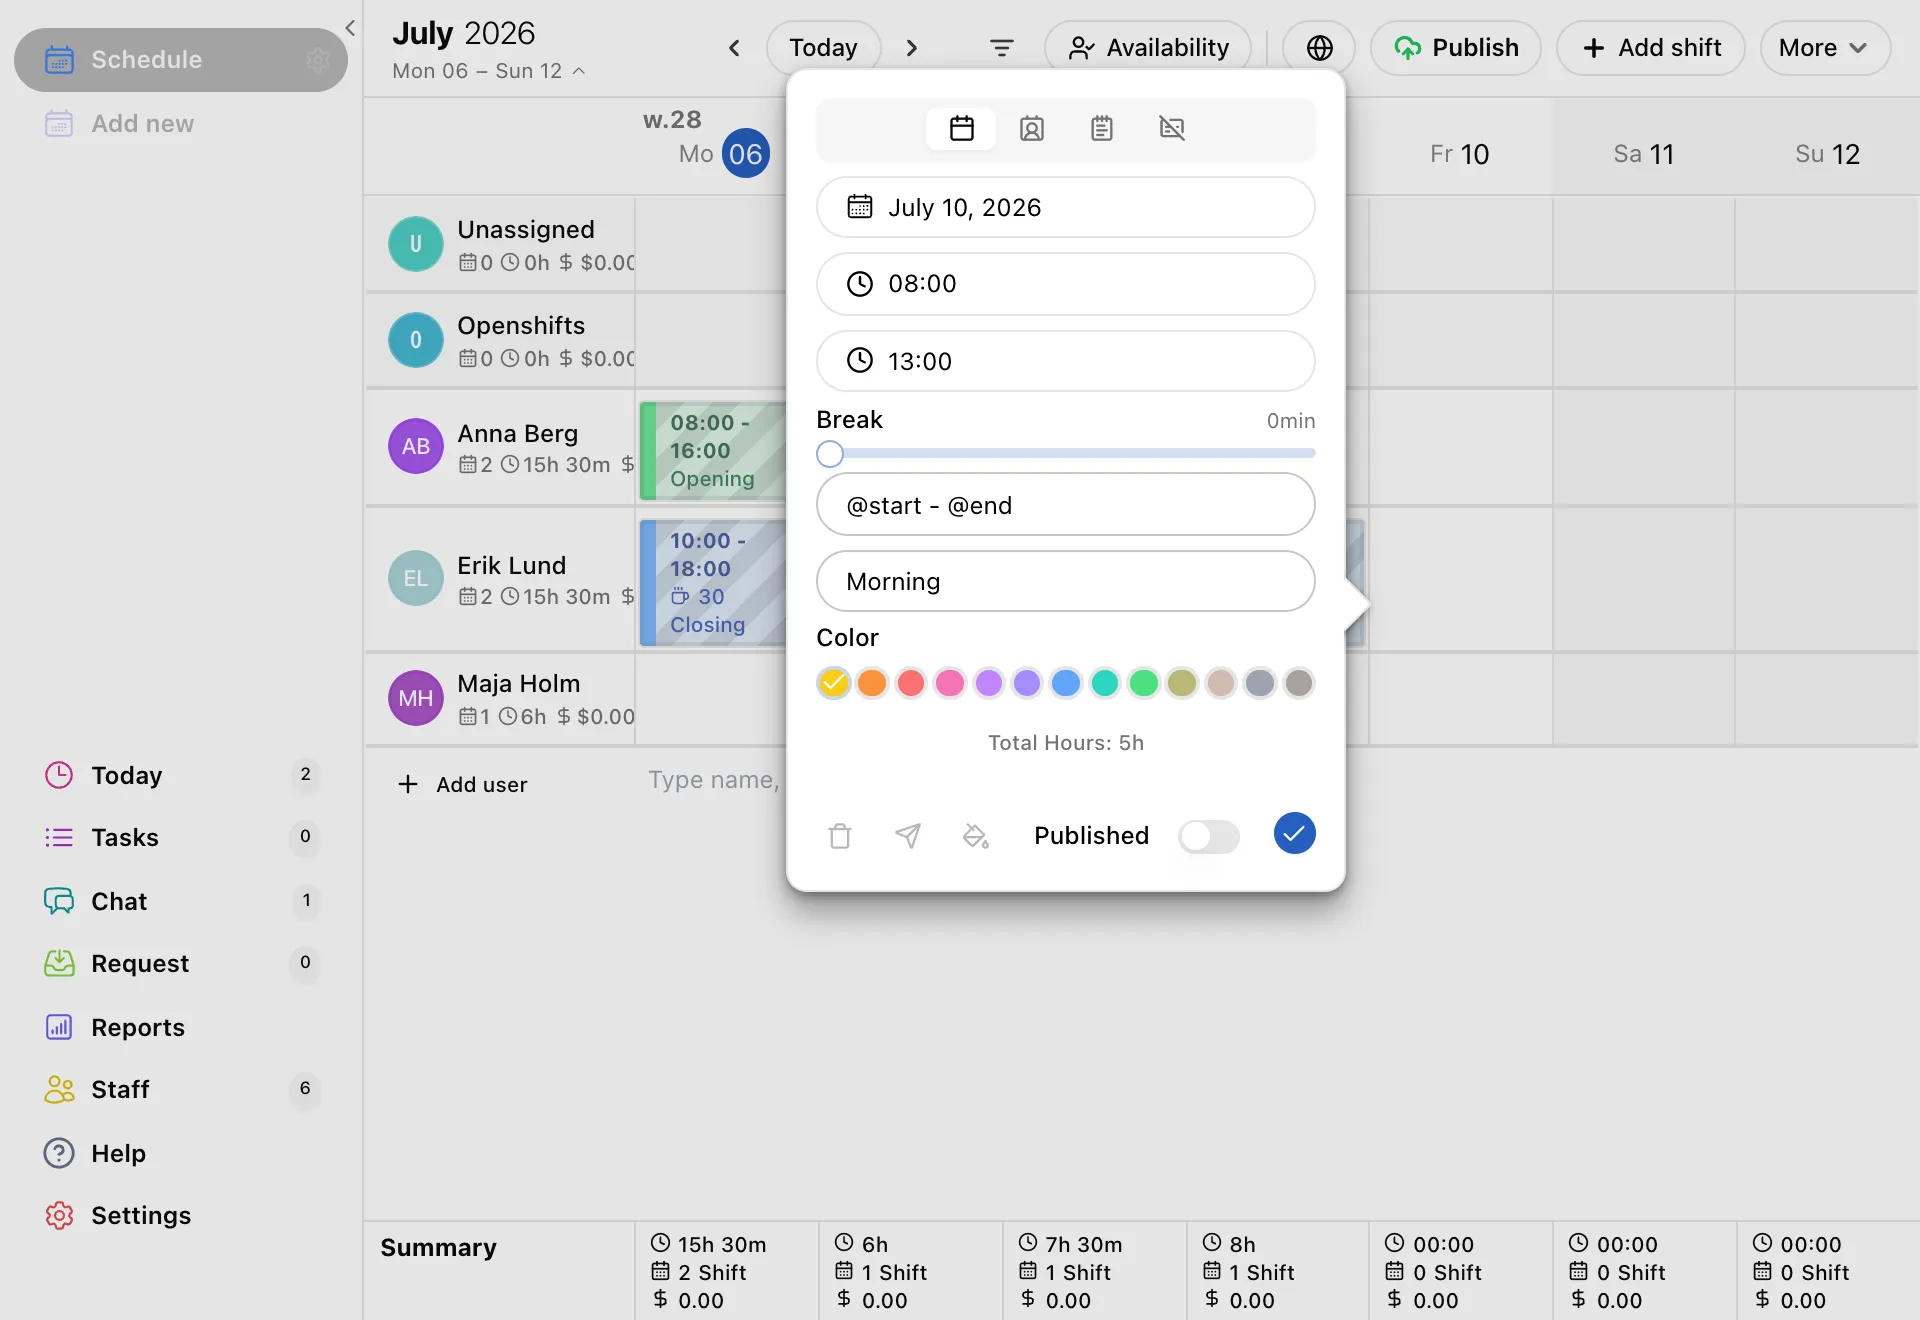
To add a shift, click the empty cell where a person's row meets a day (or press + Add shift). To change one, just click the shift. Either way the same little card opens:

The shift card open over the schedule: date, start and end time, break, label, note, colour, and a save tick.
  • Set the date, start and end time, and add a break if needed.
  • Give it a label, a note, or a colour to make the week easy to read.
  • Use the person tab at the top of the card to choose who works it.
  • Press the tick to save, or the bin to delete the shift.

Publish, so your team can see it

Everything you do is saved as a draft that only you can see (draft shifts show as faded / striped). Your team sees a shift only once it is published. You can do that two ways.

Publish a single shift

Open the shift and flick the Published switch at the bottom of the card, then press the tick. Handy when you've changed just one person's shift and want only that to go out.

The shift card with the Published switch along the bottom row, next to the save tick.

Publish the whole week

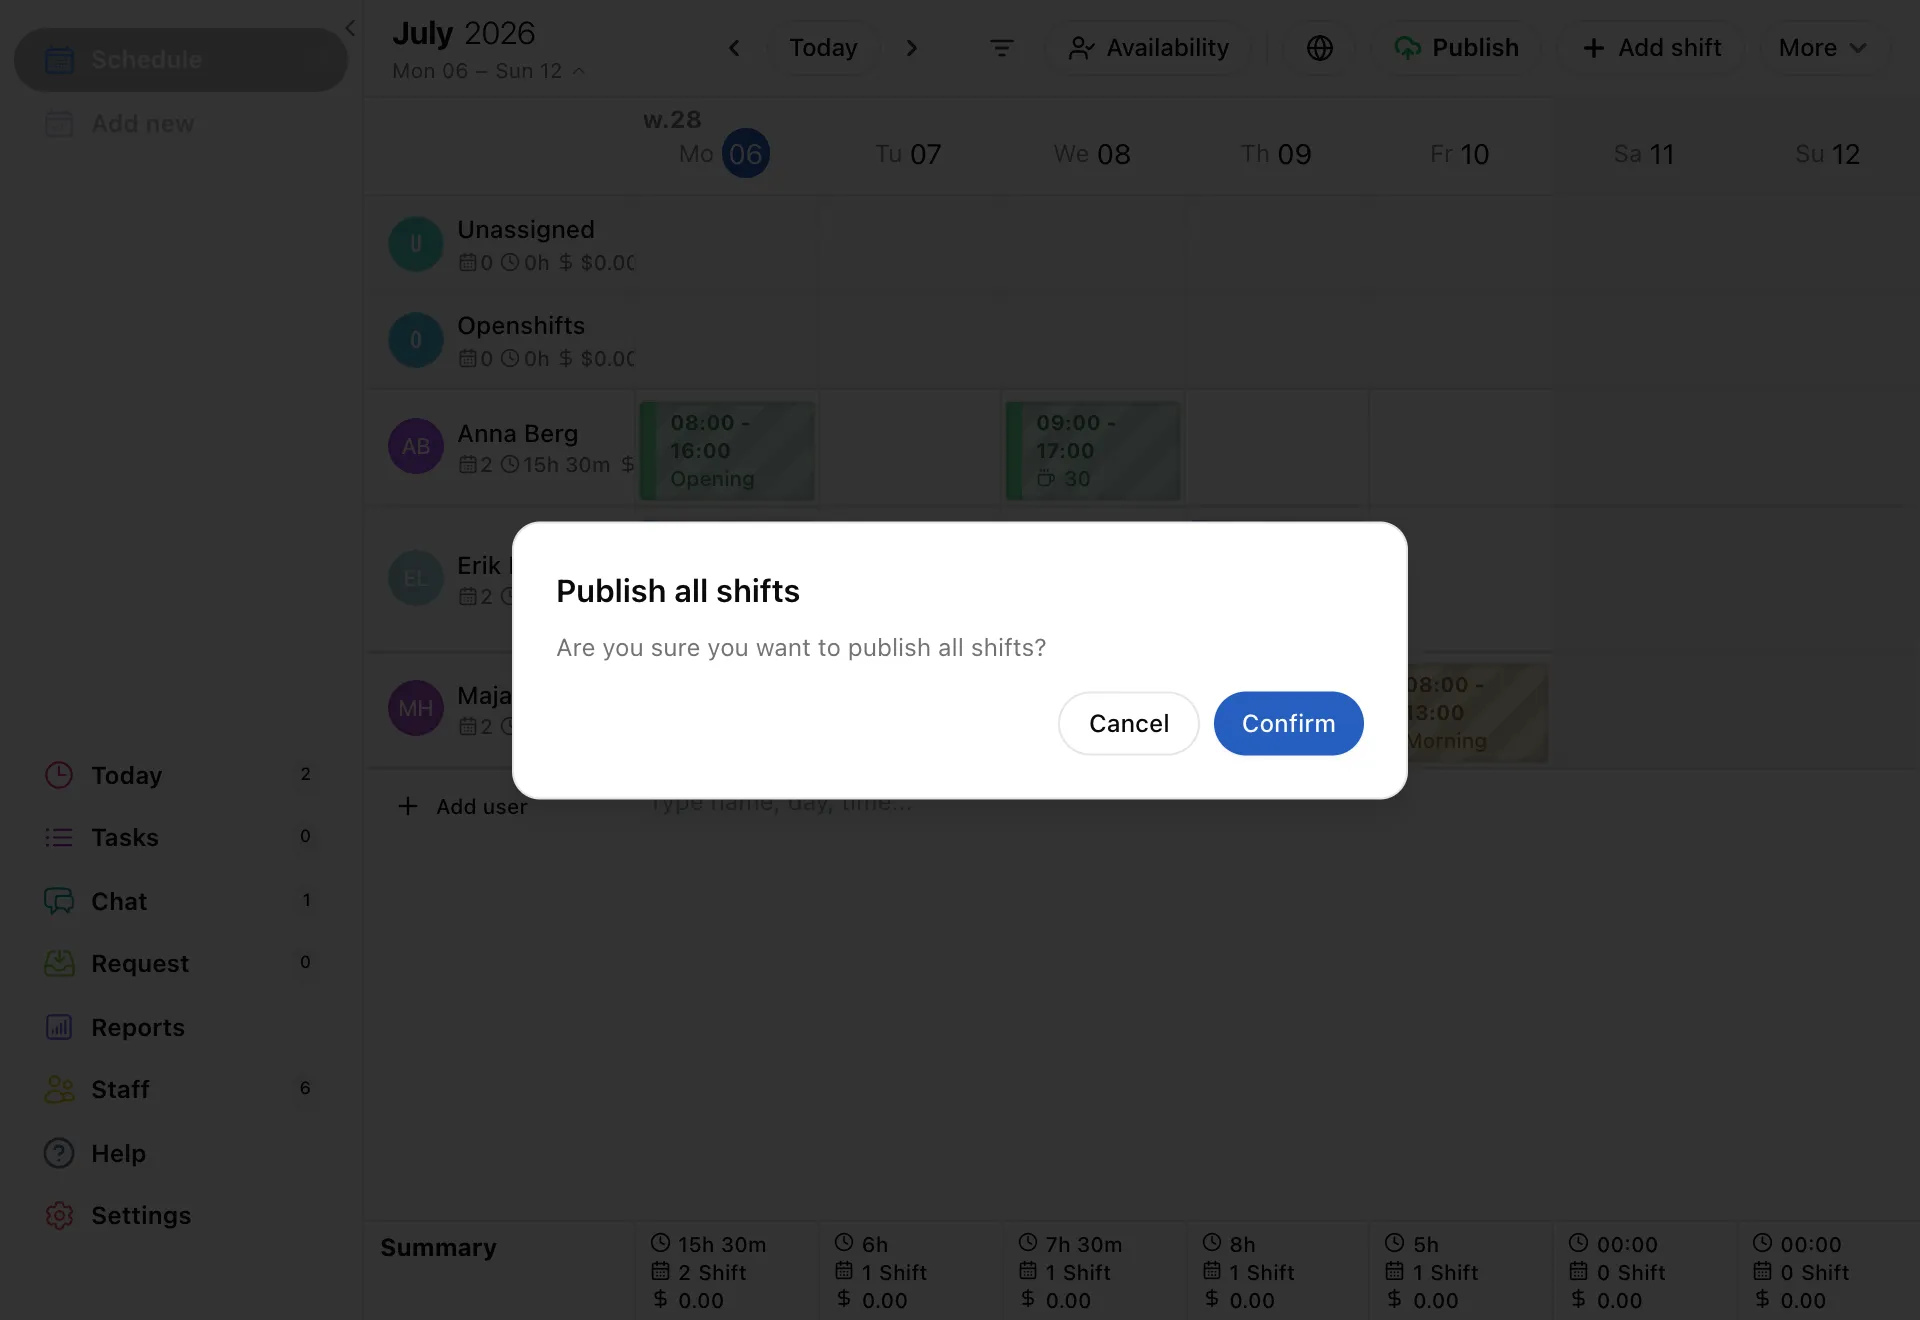
Finished building the week? Press Publish in the top bar and Confirm. Every draft shift in the week goes live to your team at once.

The Publish all shifts confirmation: Are you sure you want to publish all shifts? Cancel or Confirm.

If staff say "I can't see my shifts", it is almost always this. Open the week and press Publish.

Common questions

Still stuck? We're here.

Tell us what you're trying to do and we'll point you straight to it. A screenshot helps a lot.

Email support